Here you will ge to know how to make pendrive as ram windows 10. If you’re using Windows Vista, 7, 8 or 10 Windows comes with a built-in feature that makes it easy to allocate the entirety of your flash drive as extra memory.It can be accessed when needed.
There are two workarounds you can consider, each with its own limitations:
ReadyBoost:This feature utilizes a portion of your USB drive as a cache for frequently accessed files, potentially speeding up system performance for specific tasks like opening applications and files. Keep in mind that ReadyBoost benefits are limited and depend on factors like your existing RAM and drive type (SSDs offer minimal gain).
How to use ReadyBoost in Windows 10 to make pendrive as RAM:
Step 1 : Insert your USB drive and format it if necessary.
Step 2 : Right-click the drive in File Explorer and select “Properties.”
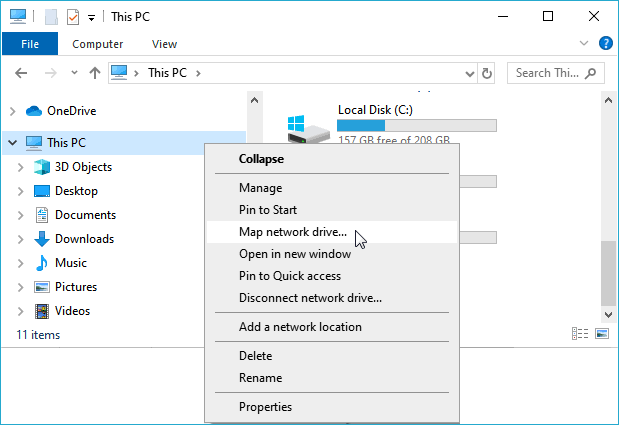
Image of Windows 10 File Explorer right-click properties menu
Step 3 : Click the “ReadyBoost” tab.
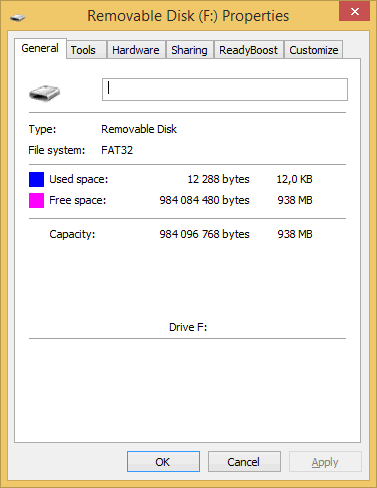
Step 4 : Select “Use this device” and choose how much space you want to allocate (recommended maximum is 25% of the drive’s size).
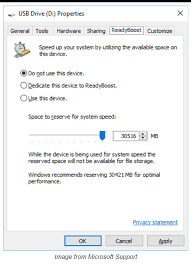
Image of Windows 10 ReadyBoost properties menu
Step 5 : Click “Apply” and then “OK.”
Virtual Memory: Windows can utilize a portion of your storage space as “virtual memory” to act as an extension of your physical RAM. While not as fast as true RAM, this can help alleviate low memory situations and prevent system crashes. However, using a USB drive for virtual memory is not recommended due to its significantly slower read/write speeds compared to internal storage. It can significantly impact performance and even shorten the lifespan of your USB drive.
Proceed with caution and only consider this if you’ve exhausted other options like increasing physical RAM.
Here’s how to configure virtual memory (remember, consult documentation for appropriate values based on your RAM)
- Right-click This PC icon on your desktop and select “Properties.”
- Click “Advanced system settings
- Under “Performance,” click “Settings.”
- Click the “Advanced” tab.
- Click “Change” under “Virtual memory
- Uncheck “Automatically manage paging file size for all drives.
- Select your USB drive under “Drives” and choose “Custom size.”
- Enter the desired initial and maximum size for the paging file.
- Click “Set” and then “OK.”
Important Reminders:
Both ReadyBoost and virtual memory on a USB drive are considered last resorts and have drawbacks. Upgrading your existing physical RAM is the most effective way to improve system performance and avoid potential complications.
Using a USB drive for virtual memory can significantly impact performance and shorten its lifespan. Only use this option if absolutely necessary.
- These methods offer minimal, if any, performance improvement. In fact, they might even degrade your system’s performance due to the bottleneck created by the slow USB drive.
- Changes are temporary and revert on restart.
- Consider the risks and alternatives carefully before proceeding.
I hope this explanation clarifies the available options and helps you make an informed decision. Feel free to ask if you have any further questions on comment section.